steps:
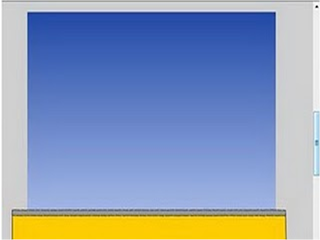
• Make the background layer and then draw a rectangle that meets the stage, give a blue color with shades (use GRADIENT TRANSFORM TOOL or press the (f)). In addition we can also add the image path. This is for our use as a background or a background image so that the animation look more beautiful.

after that , lock the background layer by using the LOCK / UNLOCK Layers to make easier for other objects.
• Create a new layer named layer "car". In frame 1 layer draw a car without wheels cars using existing tools. For a while the car because
they were made without the wheel to the wheel we will create movie clip wheel that can rotate.
Still on the same layer draw a wheel / tire, wheel image selection and then right click and select convert to symbol will display a new dialog box, name the "tire" and select type "movie clip" OK.
After that double click on the movie clip into the timeline tires for tires. After that, right-click the 20th frame and then select insert keyframe. In the middle of the frame 1-20 right-click and select create motion tween.
• Click on frame 1 and open the Properties panel (Ctrl + F3) and change the option to rotate the contents to "CCW" for the wheel / tire to spin, once it has completed the animation wheel we made (spinning), press Ctrl + Enter to try. Wheels has been completed and can be rotated, but if we look carefully there is a little discrepancy in the rotation wheel. This is because the position of the wheels on the frame 20 with the position of the frame 1.
• Create a new layer and name it "action", right click on the frame layer 19 action and open the action panel (F9) and then type the following script
gotoAndPlay (1);
Wheels has been completed. Out of the timeline wheel / tire then mounted on both the front and rear of the car. Selection of images of cars and tires then right click and select convert to a movie clip symbol, name the "car".
• In frame 1 layer car put the car outside the stage right side, right click and select insert frame 70 keyfame.
• Right-click in the middle frame between frames 1-70 and select create motion tween. At frame 70 to move the cars out of the left side of the stage. Make it as if the car is running on top of the car.
• Create a new layer and name it "formula"
• In frame 1 layerr formula make a rectangle using the rectangle tool (R) then the option at the bottom of the tool pane click menu set corner radius and change the value to 5.
• Write the formula tenses the rectangle using textool (T)
Picture strap as binding rectangle was then stretched out as if to touch down to the car. Selection rectangle and string and press Ctrl + G to make it a group or can we convert a movie clip. Put the picture out and stick it right stage strap attached to the car so that if
• Right-click on frame 45 and select insert keyframe, if we can see here the mobile will be in the middle of the stage while the rectangular image / formula still outside the stage, drag the formula to remain attached to the car.
• In the middle frame between frames 1-45 right-click and select create motion tween.
• Right-click on frame 50 layerrumusdan select insert keyframe. Change the formula so that regardless of the position of the car. Then give the motion tween.
• Click on frame 55 layerrumuskemudian sliding toward another formula, create motion tween.
• Do the same thing every 5 frame to frame to 80.
• Insert a keyframe at frame 100 and drag the formula to the top, click on the formula and then open the Properties panel Ctrl + F3. Change the color to "Alpha" "0%".
• If the above steps done correctly, the car carrying the formula animation has finished.
In finishing, this animation we will create a fullscreen automatically when the first run.
• Create a new layer and name the layer "script", in frame 1 layer panel open action script and type the following script
fscommand ("fullscreen", "true");
Once it can be directly published.
For other formulas also do the same as above


0 komentar:
Posting Komentar